It can be accessed by selecting the Subject/Register for subject menu item.
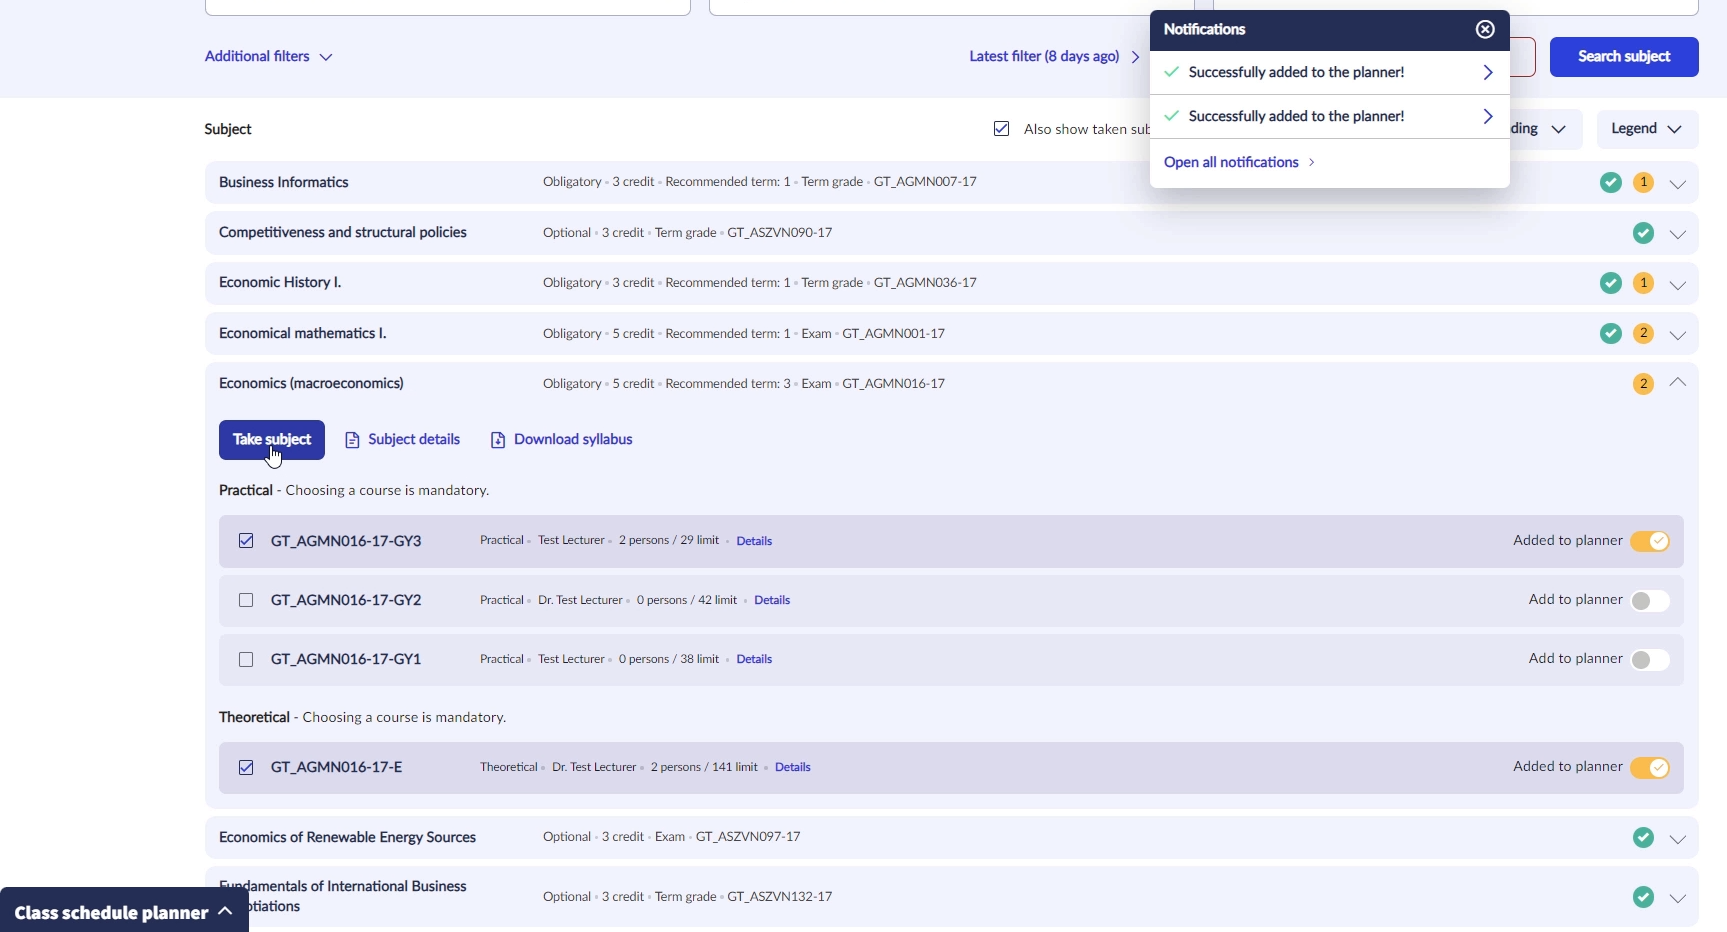
After entering the filter criteria, you can use the Search subject button to list the subjects that match the criteria. By clicking on the ˅ symbol at the end of the row of the chosen subject, the courses of the subject will be displayed. In order to register a subject you must select the checkboxes in front of the rows of the courses you wish to register, then you may register the subject with the Take subject button. If the selected course or the subject cannot be registered for some reason, information about the exact reason appears in the push notification in the top right corner.
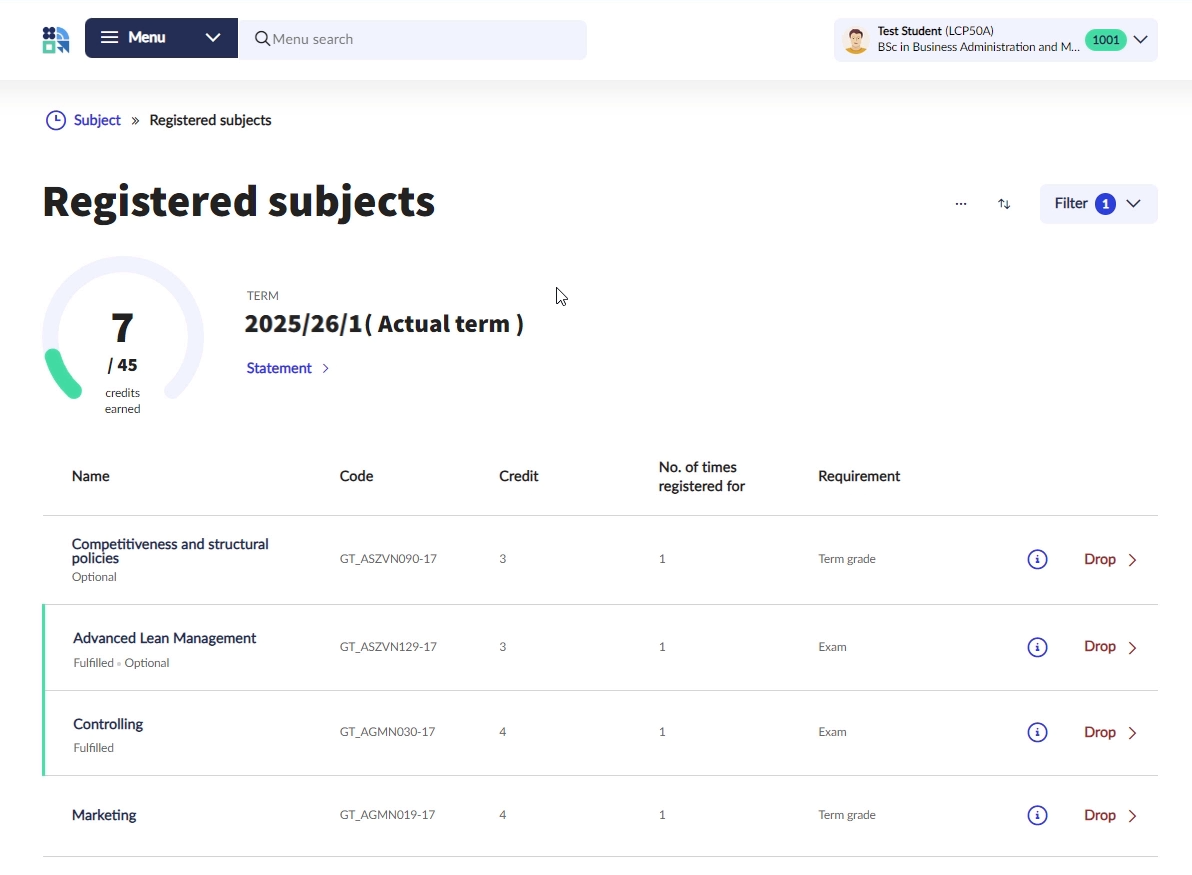
You may drop a subject with the Drop subject button. This action drops the subject and all the connected registered courses, and simultaneously deletes them from the Class schedule planner (see below).
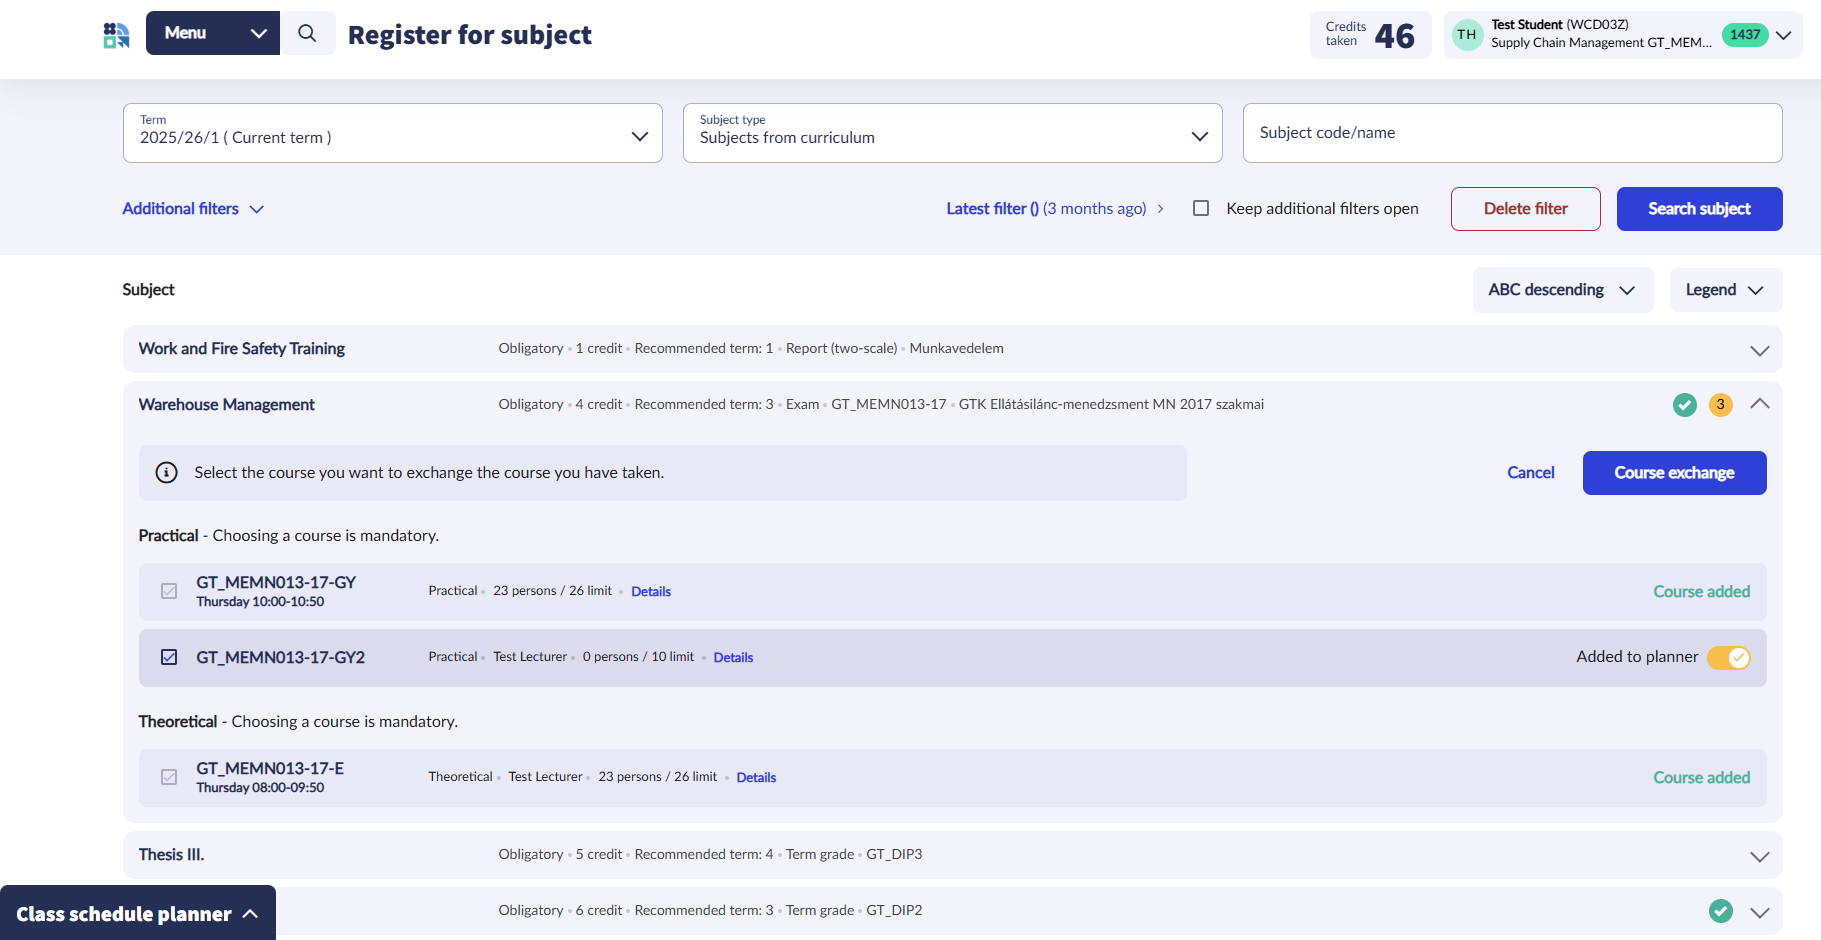
Change course: If the subject has several courses of the same type, it is possible to change course. Clicking the Change course button launches the process of the course change. It changes the status of the row of the already registered course to inactive, and you must select the course you would like to change it to. The process is completed with the Course exchange/Exchange button.
If you only use the Add to planner option at the end of the course row, the chosen course will not be taken, but will only be added to the Class schedule planner.
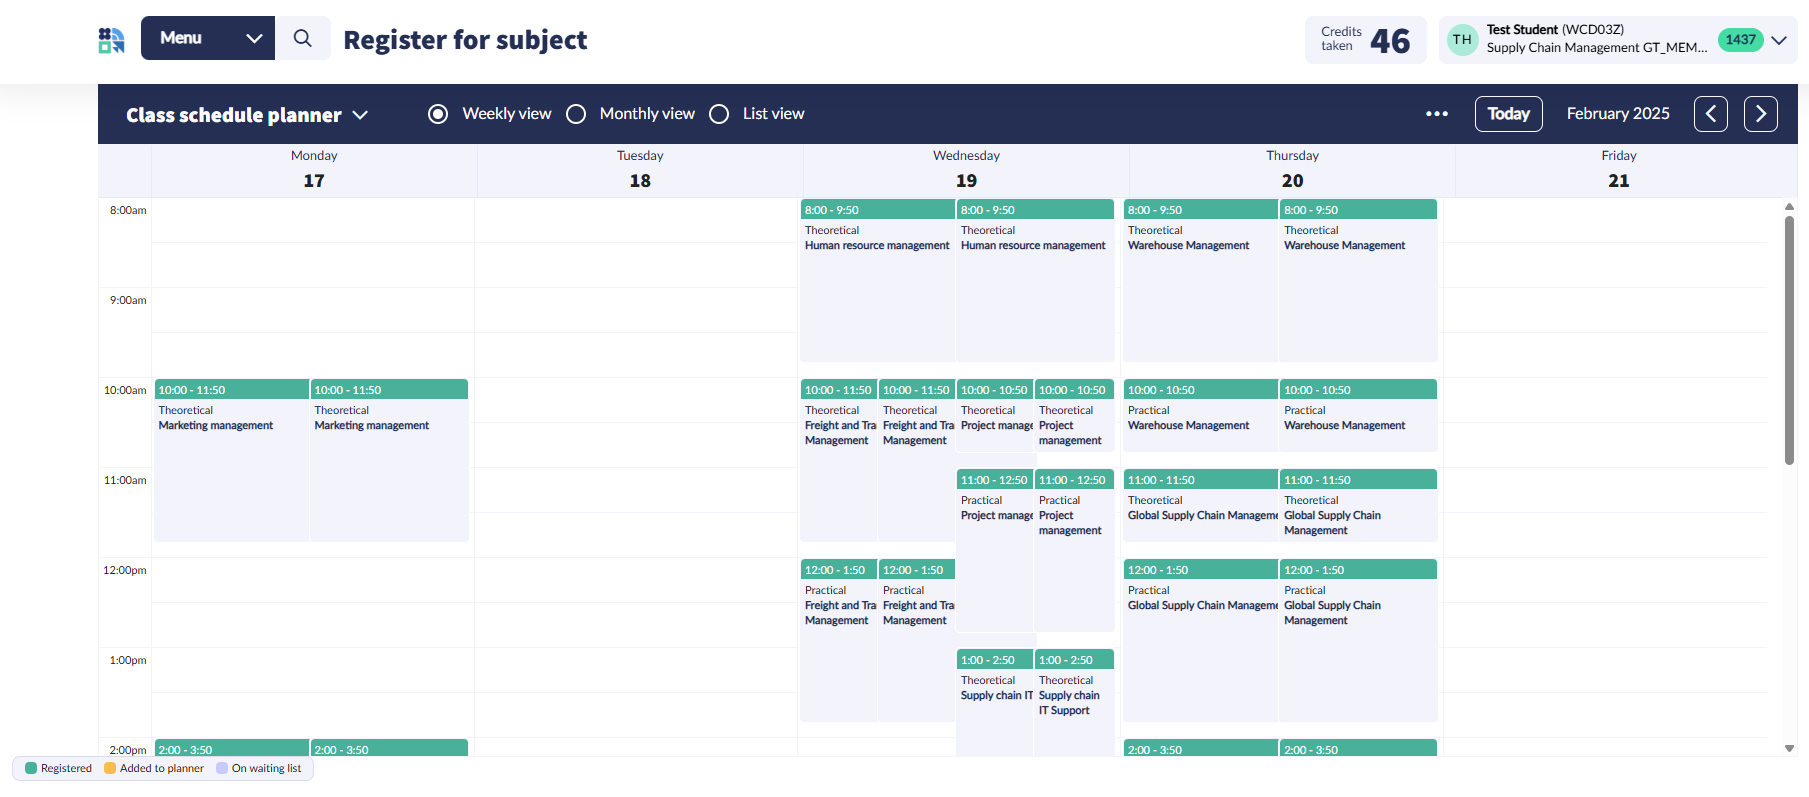
Class schedule planner: Can be opened in the lower left corner. The courses added to the Planner and having a schedule can be viewed in the Weekly or Monthly view. With the help of the Class schedule planner you are able to create an ideal schedule for the semester already before the subject registration. The courses that can be registered for a subject can be compared: which fits best in the schedule.
Important! The Add to planner function can also be used for subjects and courses that do not yet have a time slot at the time of publication. If you want to display all subjects and courses sent to the Planner on one page in the days before subject registration, select List view on the Class schedule planner page!
Registered subjects can be viewed on the Subject/Registered subjects screen. By default the subjects registered in the actual semester are displayed on the screen. By changing the semester in the filtering tool, the subjects registered in a previous semester of the education can be viewed too.
A pie chart above the subject list show the completed credits out of the credits taken in the actual semester.